

You stand in the middle of your home with a long list of ideas, feeling a strange mix of excitement and anxiety.
You want to install a sleek kitchen island, replace worn living room floors, update dated bathroom tiles, and repainting the entire interior. But then you realize the roof leaks during heavy rain, a circuit breaker trips whenever the microwave and toaster run together, and a mysterious water stain on the hallway ceiling gets darker every month.
Where on earth do you spend your hard-earned money first?
If you guess your way through a home remodel, you risk spending thousands on a stunning kitchen—only to tear open fresh drywall two months later when an uninspected plumbing stack fails. Following a logical home improvement project order protects your investment, eliminates costly rework, and turns a chaotic renovation into a smooth, predictable transformation. Here is the definitive, step-by-step sequence to execute your home updates in the exact right order.
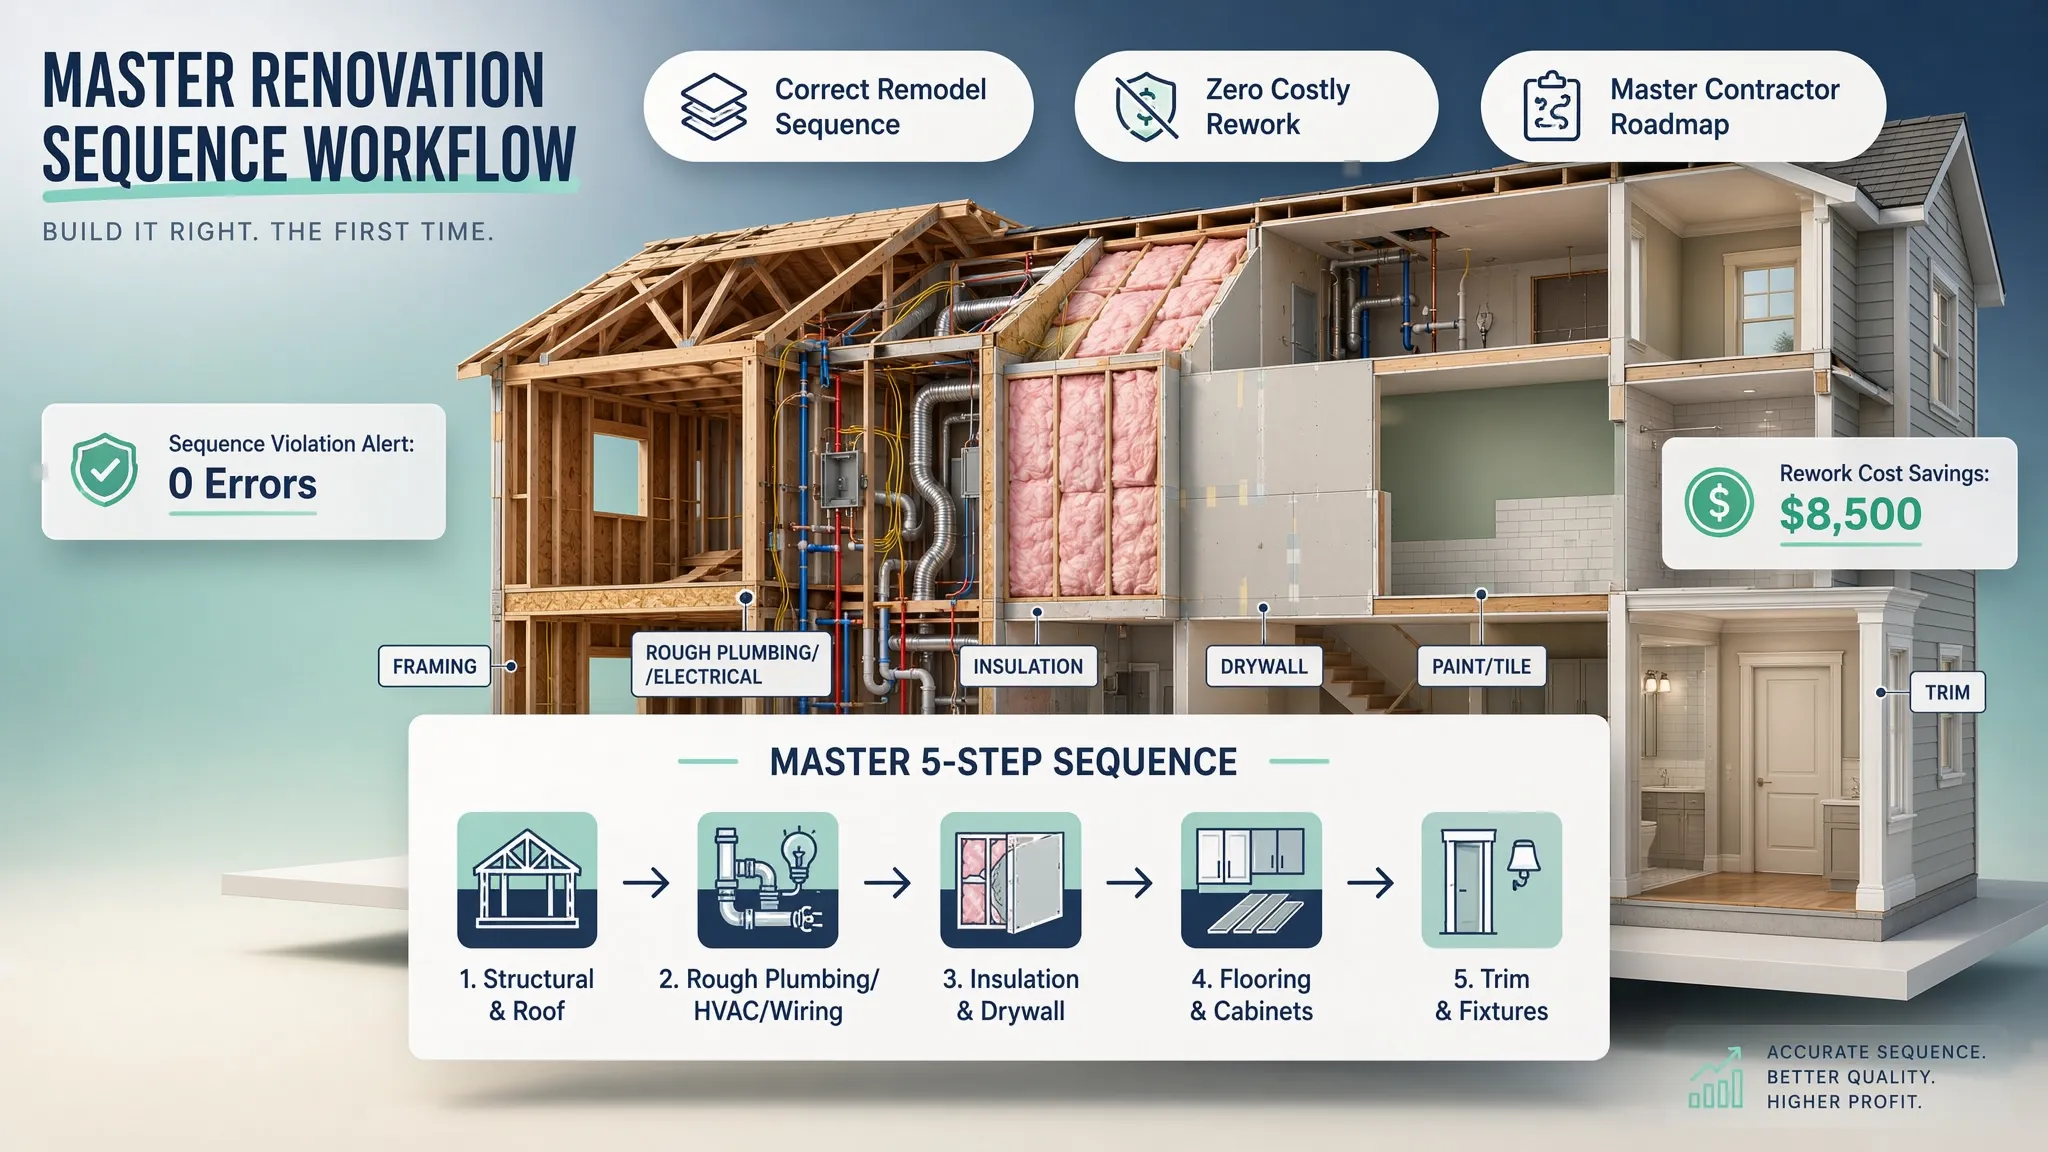
1. Which Home Improvements Should You Tackle First?
The biggest trap when planning home updates is prioritizing what looks outdated over what keeps the house dry, safe, and structurally sound.
To rank your projects effectively, evaluate every task against a strict home renovation priorities matrix before looking at tile samples or paint chips.
[ Tier 1: Critical Safety & Structural Integrity ] ===> Roof Leaks, Foundation Cracks, Panel Upgrades
                                                       (Fix First Immediately)

[ Tier 2: Building Envelope & Moisture Protection] ===> Windows, Siding, Gutters, Exterior Insulation
                                                       (Fix Second to Protect Interior)

[ Tier 3: Rough Mechanicals & Internal Systems ]   ===> Plumbing Lines, Electrical Wiring, HVAC Ducts
                                                       (Fix Third Behind Walls)

[ Tier 4: Finish Surfaces & Interior Aesthetics  ] ===> Cabinets, Tile, Flooring, Trim, Paint
                                                       (Install Last)
Systematically rank your home projects using these core criteria:
- 1. Active Damage & Water Ingress: Water leaks are time bombs. Roof punctures, failing window seals, or leaky plumbing lines take immediate priority over cosmetic upgrades.
- 2. Safety & Code Hazards: Exposed electrical wiring, failing breaker panels, or rotted subfloors must be resolved before bringing contractors into the space.
- 3. System Dependencies: Ask yourself: Will this job require tearing open a surface I plan to finish later? If the answer is yes, the behind-the-wall system must be completed first.
- 4. Daily Life Friction: Once safety and structural issues are resolved, prioritize rooms that cause the most daily friction—such as an unusable primary bathroom or a dysfunctional kitchen.
2. Fix Water, Structural, and Safety Problems Before Cosmetic Upgrades
It is tempting to ignore a minor roof drip or an outdated electrical panel so you can spend your full budget on quartz countertops and solid hardwood floors.
However, covering up underlying structural or moisture defects with expensive cosmetic finishes is a recipe for financial disaster. Water trapped behind fresh drywall breeds mold, rots subfloors, and ruins new cabinetry within months.
Before locking in your cosmetic budget:
- Conduct a Thorough Envelope Audit: Inspect your attic for water stains, check crawl spaces for dampness, and verify that foundation perimeter walls are dry.
- Upgrade Inadequate Service Panels: If your electrical panel is under 150 to 200 amps, upgrade it before adding modern kitchen appliances, electric vehicle chargers, or central HVAC units.
- Remediate Hazardous Materials: If your home was built before 1978, hire certified professionals to test for lead paint and asbestos before tearing into plaster walls or old floor tiles.
3. Decide the Full Scope Before Booking Separate Trades
A common mistake homeowners make is hiring a plumber for an isolated bathroom update, an electrician for a kitchen update, and a painter for hallways—without mapping how these trades overlap.
Booking trades piecemeal without a master scope leads to duplicated labor, trade scheduling conflicts, and unnecessary damage to completed work.
---------------------------------
[ Hire Plumber for Kitchen ]
                 |
[ Plumber cuts new hall drywall ]
                 |
[ Re-hire Drywaller & Painter ]
-------------------------------------
+-----------------------------------+
| Complete Master Scope Written     |
+-----------------------------------+
                 |
[ Single Rough-In Phase for All Trades ]
Build a cohesive project scope using these rules:
- Map All Shared Mechanical Pathways: If your kitchen update requires running new 220V lines or 2-inch drain pipes through adjacent living room walls, include those adjacent spaces in your initial trade scope.
- Combine Rough-In Service Visits: Have your electrician and plumber complete all rough-in work across the entire house during a single phase rather than paying for multiple service call fees.
- Lock in Spatial Layouts: Decide on wall removal, door swings, and cabinet footprints before hiring trade workers. Changing your layout mid-project creates costly change orders.
4. Choose the Right Order for Roof, Exterior, and Interior Work
If your home requires both exterior structural updates and interior cosmetic renovations, the rule is absolute: always secure the building envelope before finishing interior surfaces.
Installing new drywall, luxury flooring, and custom cabinetry while your roof, gutters, or exterior siding leak invites moisture damage that ruins your investment.
   EXTERIOR PHASE (Top to Bottom)           INTERIOR PHASE (Inside Out)
   ------------------------------           ---------------------------
   1. Roof Flashing & Shingles  =========> 4. Rough-In Plumbing & Electrical
   2. Gutters & Downspouts                  5. Insulation & Drywall Taping
   3. Siding, Windows & Doors               6. Flooring, Cabinets & Paint
The correct exterior-to-interior sequence:
- Roofing, Chimney & Flashing: Fix roof leaks first so water cannot trickle down interior wall cavities.
- Gutters & Site Drainage: Direct roof runoff at least 6 feet away from foundation walls to keep basements and subfloors bone dry.
- Windows, Exterior Doors & Siding: Replace drafty or leaking windows and siding before insulating and closing interior drywall.
- Interior Subfloors & Framing: Once the building is 100% watertight, begin interior framing and rough mechanical work with complete confidence.
5. Know When Demolition Must Happen Before Repairs and Installation
Demolition seems straightforward, but tearing down walls or ripping up flooring without a clear sequence creates structural hazards and unnecessary mess.
Demolition should never be executed as aggressive guesswork—it must follow a confirmed architectural plan.
Key demolition principles:
- Shut Off Utilities First: Locate and verify main water, gas, and electrical shut-off valves before taking a sledgehammer to a wall.
- Identify Load-Bearing Structure: Never remove an interior wall until a structural engineer or licensed general contractor verifies that it isn't supporting upper floor joists or roof trusses.
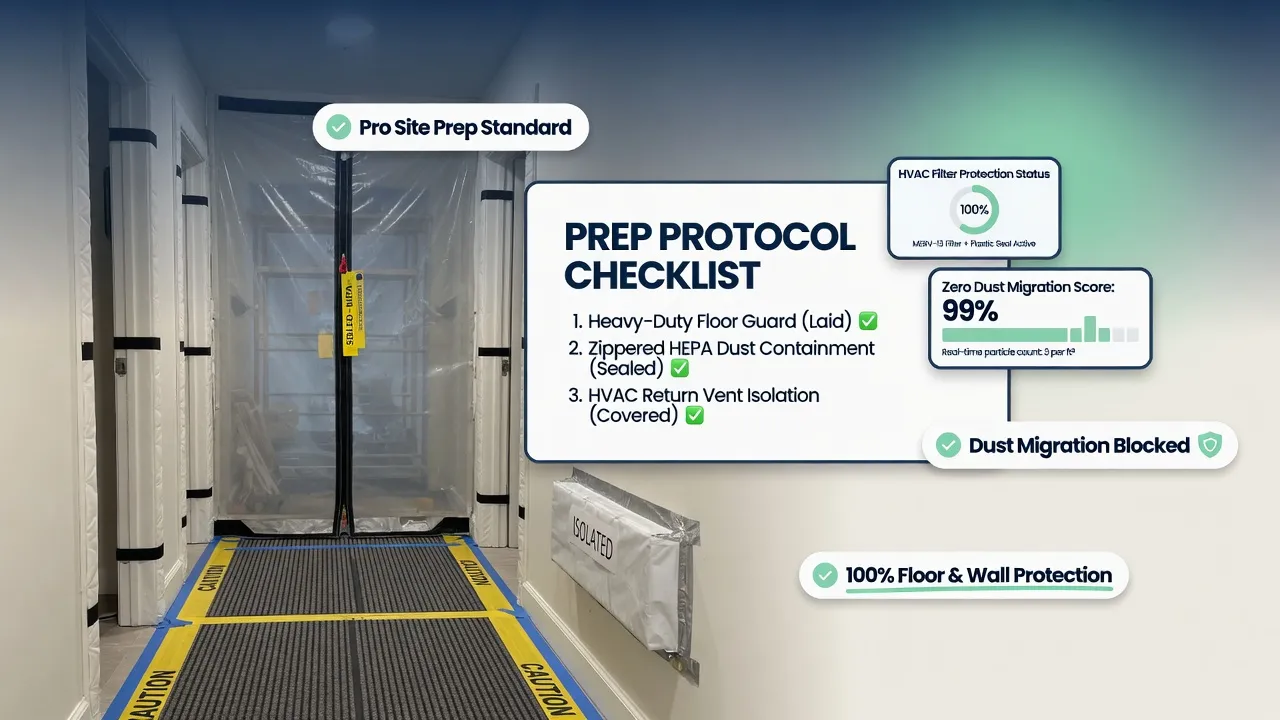
- Contain Construction Dust: Install heavy plastic zip-barriers and cover HVAC return registers before demolition starts to keep dust out of living areas.
6. Schedule Electrical, Plumbing, and Other Hidden Work Before Closing Walls
Once demolition is complete and open wall studs are exposed, you enter the most critical structural phase of your home renovation: the rough-in phase.
This is your short window to run electrical wiring, copper or PEX plumbing lines, gas pipes, and HVAC ductwork inside open wall cavities before drywall closes them up.
  [ Exposed Wall Studs ]
            |
            v
  [ Step 1: Rough-In Plumbing Drain & Supply Lines ]
            |
  [ Step 2: Rough-In HVAC Ducting & Vent Stacks ]
            |
  [ Step 3: Rough-In Electrical Cable & Outlet Boxes ]
            |
  [ Step 4: Trade Rough-In Inspections (Sign-Off) ]
            |
  [ Step 5: Install Wall Insulation & Hang Drywall ]
Why rough-in sequencing matters:
- Plumbing Lines Go First: Large 3-inch or 4-inch PVC drain pipes require strict slope angles and must be routed through studs first.
- HVAC Ducts Go Second: Metal trunk ducts and flexible supply lines require large physical pathways through floor joists and wall cavities.
- Electrical Wiring Goes Third: Flexible copper wiring can easily snake around installed plumbing pipes and air ducts.
- Complete In-Wall Inspections: Always secure municipal building permits and pass rough-in inspections before hanging insulation and drywall over mechanical lines.
For official national electrical codes, circuit breaker requirements, and wiring safety standards, consult the National Fire Protection Association (NFPA).
7. Confirm Cabinets, Doors, and Built-In Furniture Before Finalizing Measurements
Ordering custom kitchen cabinets or pre-hung interior doors based on rough wall framing measurements—before drywall is hung and mudded—is a recipe for fitting disasters.
While you should order custom cabinets and doors months in advance to accommodate lead times, final physical measurements must account for finished drywall thickness.
Avoid these measuring bottlenecks:
- Account for Drywall Thickness: Standard drywall adds 1/2 inch of thickness to every wall surface (1 full inch across a parallel room span).
- Verify Appliance Specifications: Get exact specification sheets for refrigerators, slide-in ranges, and dishwashers before finalizing cabinet cutouts and electrical outlet placements.
- Check Door Swing Clearances: Ensure pre-hung interior doors don't swing directly into light switches, cabinet doors, or HVAC wall returns.
8. Decide the Flooring and Painting Sequence for Your Actual Project
The debate over whether to paint walls or install flooring first is one of the most contentious topics in home remodeling. The answer isn't universal—it depends entirely on your flooring material and installation method.
Follow these conditional guidelines:
- Pre-Finished Hardwood or Vinyl Plank: Prime and apply your top paint coat before laying flooring. If a drop of paint falls onto bare subflooring, it won't matter. Once floors are laid, add baseboards and do quick paint touch-ups.
- Site-Finished Hardwood (Sanded On-Site): Install, sand, and stain raw hardwood floors before applying final wall paint. Heavy floor sanding equipment kicks up fine wood dust that clings to fresh paint.
- Tile and Grout: Lay floor tile and apply grout before final wall painting, as wiping away grout haze can splatter dirty water onto adjacent baseboards and walls.
9. Plan Kitchen and Bathroom Work Around Essential Services
Kitchens and bathrooms are the most complex, expensive rooms to renovate because they combine high-voltage electrical lines, gas plumbing, high-volume water supply, and waterproofing membranes in tight spaces.
Following a strict kitchen renovation sequence or bathroom order prevents expensive trade conflicts.
  [ Phase A: Demo & Waterproofing Membrane Installation ]
                       |
  [ Phase B: Rough-In Plumbing, Electrical & Exhaust Vents ]
                       |
  [ Phase C: Board Cement Board, Tape & Tile Installation ]
                       |
  [ Phase D: Set Cabinets, Measure Countertops & Install Sinks ]
                       |
  [ Phase E: Connect Faucets, Toilets & Final Electrical ]
Critical kitchen and bathroom sequencing rules:
- Waterproofing Before Tile: In bathrooms, install continuous waterproofing membranes (like Schluter Kerdi or liquid membranes) over cement backer board before setting a single tile.
- Cabinets Before Countertops: Install and level lower base cabinets perfectly before template fabricators measure for granite or quartz countertops. Countertop fabrication usually takes 2 to 3 weeks.
- Sanitary Fixtures Last: Keep toilets, delicate porcelain sinks, and chrome faucets safely packaged in boxes until all tiling, grouting, and wall painting are 100% complete.
To review official plumbing codes, drain pipe sizing standards, and fixture clearances, consult the International Code Council (ICC).
10. Which Home Improvement Projects Can Run at the Same Time?
If you want to shorten your overall home renovation project schedule, running complementary jobs concurrently saves weeks of elapsed construction time.
However, stacking too many tradespeople inside a single room simultaneously causes chaotic friction, damaged work, and safety hazards.
- Exterior roof repair & basement rough
- Electrician wiring & HVAC ducting
- Floor sander & Wall painter
- Drywall sander & Cabinet installer
Smart task pairing rules:
- Pair Off-Site Fabrication with On-Site Demo: Order custom cabinetry, windows, and countertops off-site while your crew handles on-site demolition, framing, and rough plumbing.
- Separate Wet and Dry Trades: Never schedule drywall sanders or floor refinishers in the same room where painters or finish carpenters are trying to complete delicate work.
- Assign Separate Work Zones: If work is happening inside, have your exterior roofing or siding crew work outside at the same time without interfering with interior traffic.
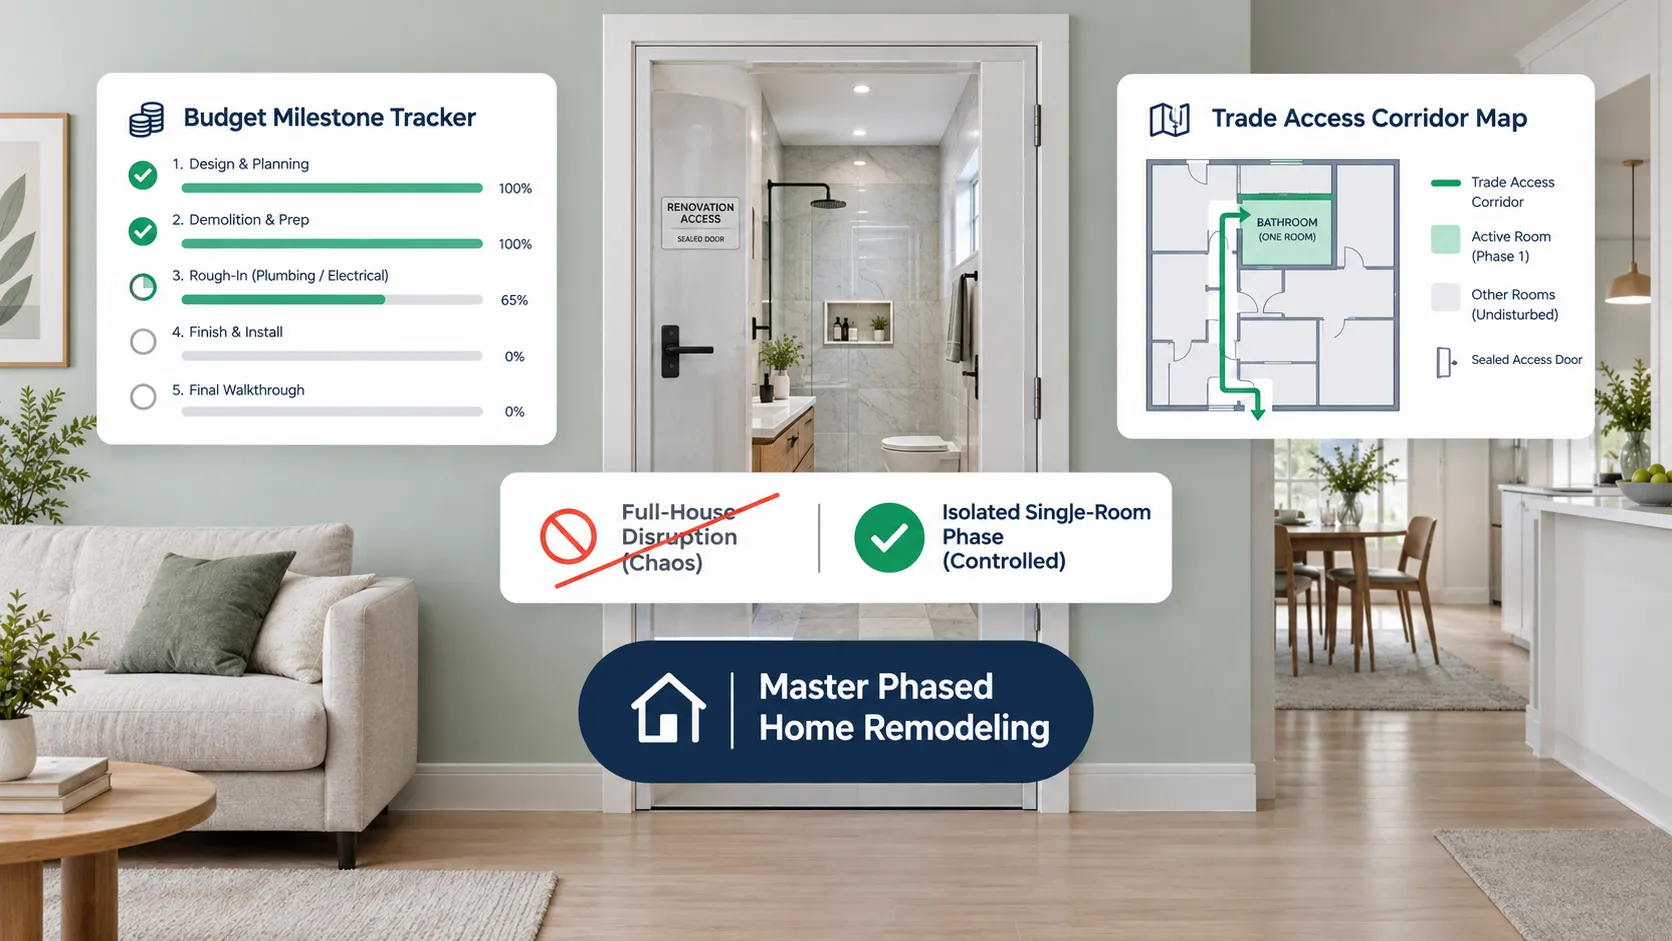
11. Choose the First Room Based on Dependencies, Not Just Convenience
When homeowners plan a room-by-room remodel, their immediate instinct is usually to pick the easiest or most visible space first.
However, picking your starting room based on shared mechanical dependencies and access routes prevents you from damaging finished spaces later on.
How to select your starting room:
- Follow the Plumbing Stack: If your upstairs primary bathroom shares a main vertical drain stack with your downstairs kitchen, renovate the upstairs bathroom first. Any plumbing leaks or floor work will happen before your new kitchen ceiling is drywall-finished.
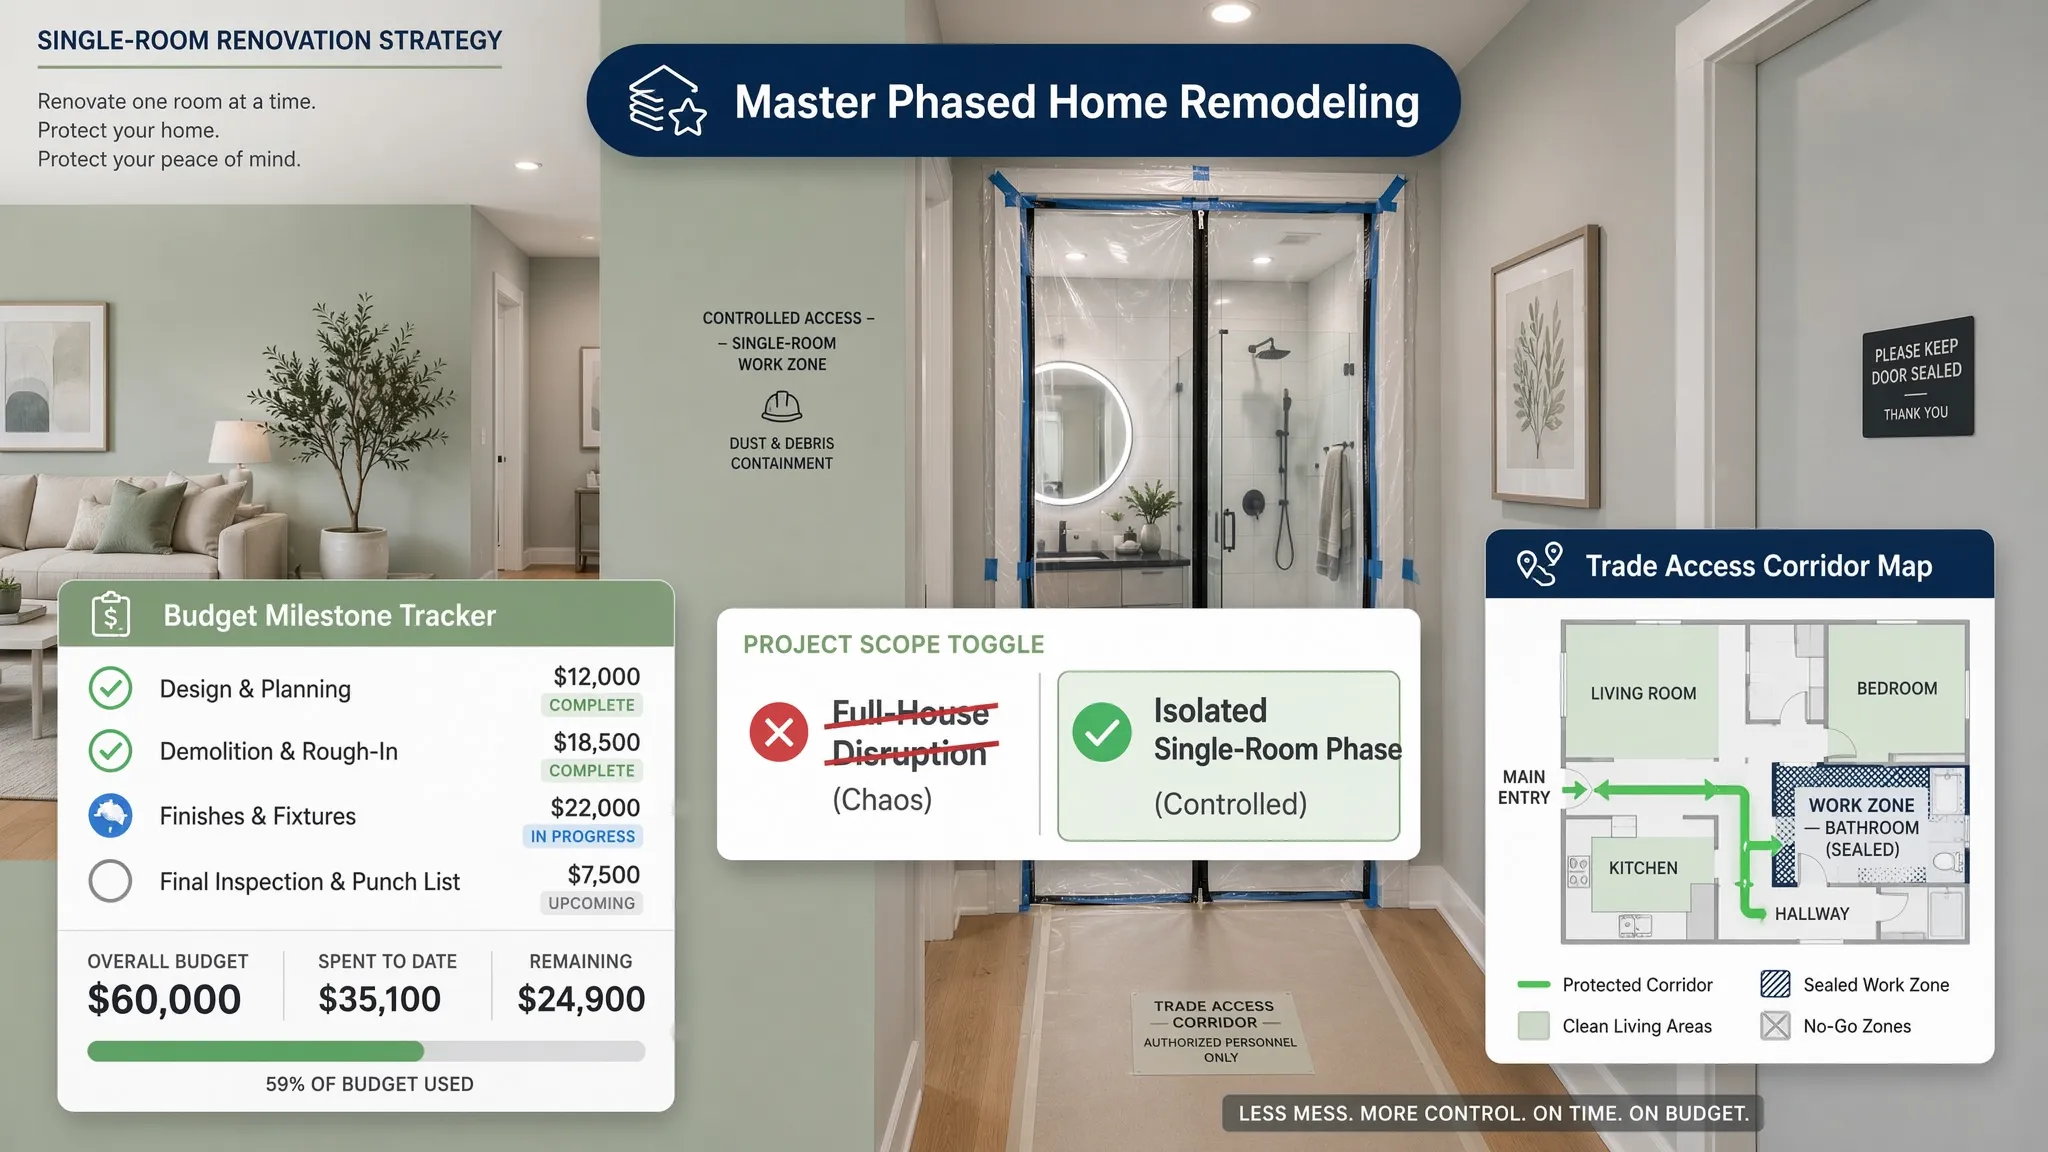
- Protect Central Corridors: Always save main entry hallways, staircases, and foyer floors for the absolute last phase of your renovation. These zones serve as primary construction corridors for moving lumber, tools, and heavy trash.
- Tackle High-Friction Daily Spaces Early: Once structural dependencies are cleared, update your primary kitchen or bathroom early so your household recovers daily functionality quickly.
If you are navigating an open layout, explore our guide on balancing spatial zoning across connected rooms to keep traffic flowing smoothly during phased work.
12. Build a Renovation Schedule Around Materials, Contractors, and Curing Time
The single biggest reason home renovation timelines collapse is that homeowners confuse working time (the hours a trade worker spends hands-on) with elapsed time (the calendar days required for materials to ship, dry, and cure).
Building a realistic home renovation project schedule requires incorporating material lead times and cure windows into your calendar.
[ Active Trade Work: 3 Days ] + [ Material Cure / Shipping: 14 Days ] = 17 Elapsed Days
Account for these critical elapsed time windows:
- Concrete & Subfloor Curing: Fresh concrete slab pourings require 28 days to cure fully before installing solid hardwood or moisture-sensitive tile adhesives.
- Drywall Mud Drying: Joint compound requires 24 hours of drying time between each of its 3 coats before sanding and priming can begin.
- Custom Order Shipping Lead Times: Custom cabinets (6–12 weeks), imported tile (3–6 weeks), and specialty windows (4–8 weeks) must be ordered long before demolition day.
For comprehensive guidelines on trade scheduling, subcontractor management, and project cost estimating, consult the National Association of Home Builders (NAHB).
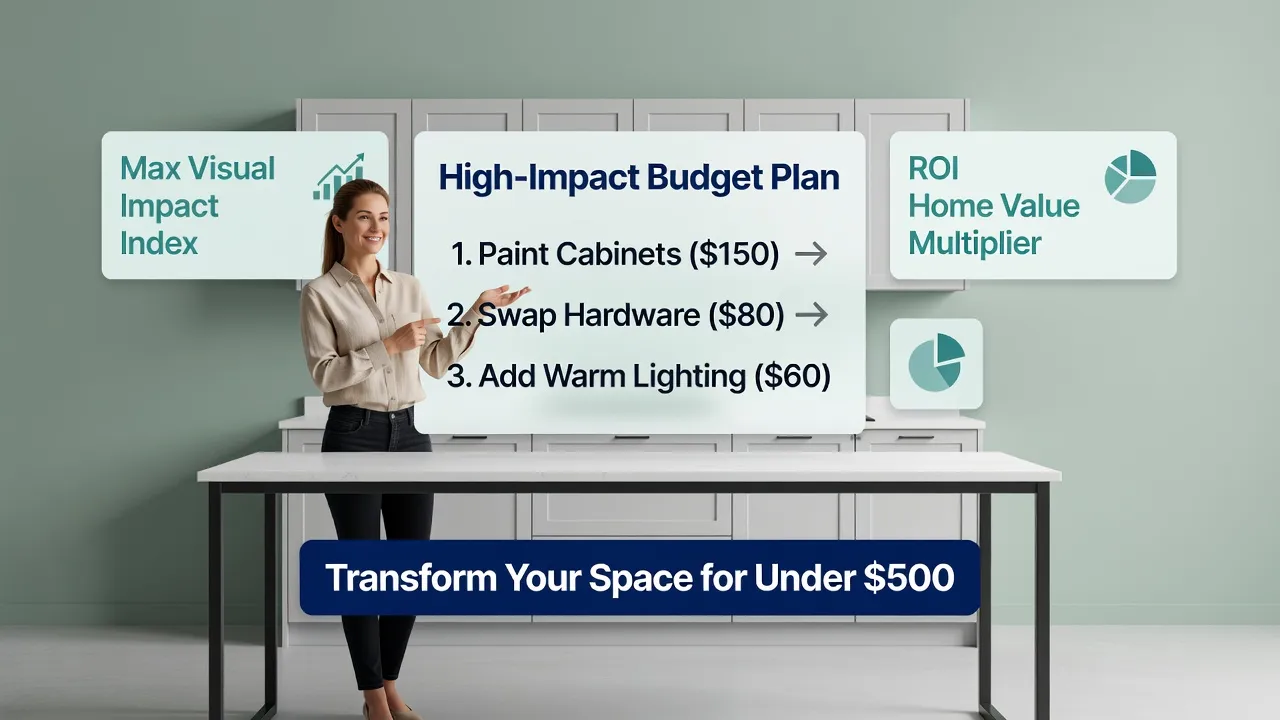
13. Set Budget Priorities Before Optional Upgrades Consume the Reserve
Budget overruns during home remodeling rarely happen all at once—they happen through a series of small, impulsive upgrades ("While we're at it, let's upgrade to marble counter tops!").
To protect your finances, establish a strict 3-tier budget priority framework before signing contractor agreements.
   [ Tier 1: Non-Negotiable Essentials ] ===> Mechanicals, Roof, Structural Framing (60%)
   [ Tier 2: Core Utility Finishes   ] ===> Quality Cabinets, Durable Flooring (30%)
   [ Tier 3: Deferrable Upgrades     ] ===> High-End Lighting, Custom Trim (10%)
Smart budget allocation rules:
- Ring-Fence Core Structural Funds: Never cut corners on rough plumbing, electrical wiring, insulation, or roof flashing to save money for decorative lighting or high-end tile.
- Maintain a Dedicated Contingency Buffer: Reserve 15% to 20% of your total renovation budget in liquid cash specifically for hidden issues uncovered during demolition.
- Defer Cosmetic Upgrades: If your budget gets tight mid-project, defer optional upgrades—like custom closet built-ins, decorative wallpaper, or high-end window drapes—that can easily be added a year or two later.
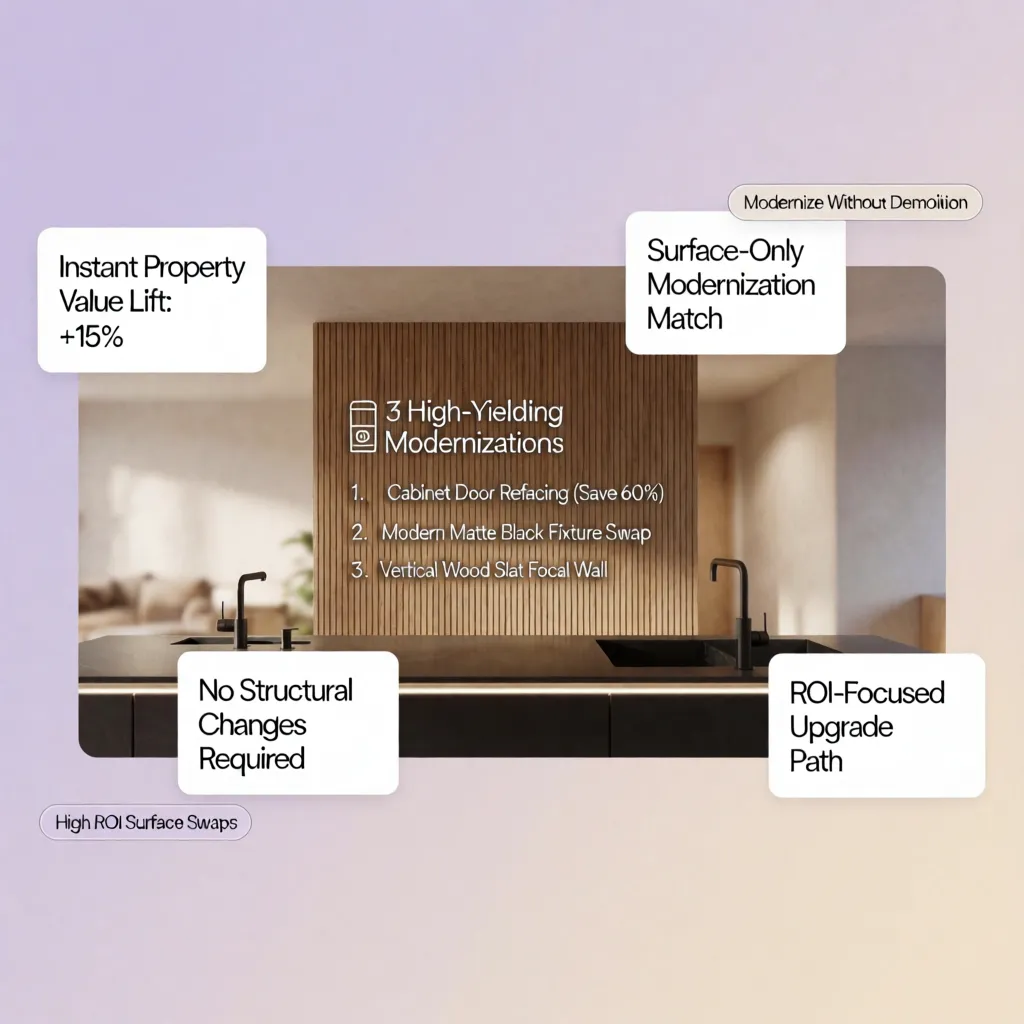
If you are evaluating options to modernize your home without structural overhauls, read our guide on updating a house without changing the layout to prioritize surface refreshes over costly structural work.
14. Use a Project-Order Checklist Before Work Begins
Ready to launch your home improvement project with complete design confidence?
Run through this comprehensive pre-renovation sign-off checklist before booking trade contractors or buying materials.
  [ Step 1: Complete Structural & Water Audit ]
                       |
  [ Step 2: Establish Master Project Scope & Permit Approvals ]
                       |
  [ Step 3: Order Long-Lead Cabinets, Windows & Valves ]
                       |
  [ Step 4: Execute Demolition & Rough Mechanical Inspections ]
                       |
  [ Step 5: Complete Drywall, Finishes & Final Fixture Hookups ]
The Ultimate Home Improvement Sequence Checklist:
Visualize Your Complete Project Sequence Before You Build
What if you could eliminate spatial guesswork, test furniture layouts, and see exactly how your color palette transitions from room to room before spending thousands of dollars on materials or contractor deposits?
When you are trying to map out a complex home update, trying to figure out how wall placements, flooring choices, and cabinetry styles will look together across open spaces can feel like a stressful gamble. A single miscalculation on paper can turn into a costly contractor change order once construction starts.
With DesignHome, you don't need to learn complicated professional CAD software or deal with steep design learning curves. You can simply upload a picture or floor plan of your room to test layout ideas, experiment with floor transitions, compare cabinet finishes, and unlock custom spatial possibilities tailored to your exact floor plan.
Eliminate project sequencing uncertainty—visualize and refine your dream home vision with total design confidence before demolition day ever begins.
External Resources & Industry Standards
To explore deeper technical insights into home space planning, trade safety, and building codes, consult these authoritative industry resources:
- National Association of Home Builders (NAHB) – Official guidelines for home remodeling, trade scheduling, safety standards, and project cost estimating.
- American Society of Interior Designers (ASID) – Professional standards for residential space planning, material selection, and structural layouts.
- International Code Council (ICC) – Residential building codes, electrical permit guidelines, and plumbing installation safety standards.
- National Fire Protection Association (NFPA) – Residential electrical safety codes, circuit breaker standards, and job site fire prevention guidelines.
- Paint Quality Institute – Expert advice on wall surface preparation, washable paint sheens, and moisture-resistant finishes.
Frequently Asked Questions About Home Improvement Project Order
What home improvements should be done first when buying an old house?
Always resolve active roof leaks, structural foundation concerns, outdated electrical panels, and plumbing leaks first. Once the building envelope and rough mechanical systems are safe and dry, proceed with interior drywall, flooring, kitchen cabinets, and cosmetic paint updates.
Should you replace floors or paint walls first during a remodel?
For pre-finished hardwood, luxury vinyl plank, or carpeting, paint the walls first so accidental paint splatters fall onto bare subflooring. Once flooring is laid, install baseboards and apply quick paint touch-ups. However, if you are installing site-finished hardwood that requires heavy sanding on-site, sand and stain the floors before applying final wall paint to prevent wood dust from clinging to fresh paint.
What comes first in a kitchen remodel: cabinets or flooring?
In a complete kitchen remodel, install lower base cabinets before templating countertops, but run luxury vinyl plank or hardwood flooring beneath base cabinets if you want a seamless floor plane. If using floating laminate or tile floors, install cabinets first and lay flooring up to cabinet bases with shoe molding trim to allow floor expansion.
What is the correct trade order during a major home renovation?
The standard trade order is: demolition crew, framing carpenter, plumber (rough-in), HVAC technician (rough-in), electrician (rough-in), building inspector, insulation installer, drywall crew (hang, tape, mud), painter (primer coat), tile setter, cabinet installer, countertop fabricator, flooring installer, finish plumber/electrician (fixtures), and finish carpenter (trim/baseboards).
How do I stop contractors from damaging finished work during a phased renovation?
Cover finished hardwood and tile floors with heavy-duty Ram Board cardboard sheets, wrap interior door jambs with plastic guards, seal active construction zones with floor-to-ceiling plastic ZipWall curtains, and save high-traffic entry hallways and staircases for the final phase of your remodel.


